

How to Decorate Your Christmas Tree Like a Pro
Do you have a countdown to Christmas going yet? In case you're wondering, it's just 19 days until the big day -- WOAH! But, no need to panic. I'm here to help!
Do you have a countdown to Christmas going yet? In case you're wondering, it's just 19 days until the big day -- WOAH! But, no need to panic. I'm here to help!
I’ve been told more than a time or two that my Christmas trees are a bit dreamy, and they could be featured in a magazine. (The highest compliment a designer could get this time of year!!) So, if you’re looking for that swoon-worthy Christmas tree how-to, we’ve got you covered.
Cozy up by the fire, grab some hot cocoa, and be ready to score all the tips on how to decorate your Christmas tree like a pro this season. We can’t wait to see how your holidays are transformed by setting the intentions of your space with a HUGE impact—a stunning Christmas tree!
Envious Evergreen
For starters, let’s begin with the Christmas tree itself. The size, the width, and the look all matter here, and can have a HUGE impact on how decked out (or not!) your look might be. If you’re in the market for a Christmas tree, know how tall your ceilings are where you plan to place the tree.
If you’re hoping for a showstopper tree, go for a wider, fuller tree, that is just over 1 foot shy of your ceiling height (this extra space will allow for a great tree topper at the end). If you’re looking for a tree to fit in tighter quarters, follow the same height rule, but know the width of your space. In this case, a slimmer tree may do.
Light it Up
If you’re selecting a tree, or need to add lighting, I always recommend the classic white twinkle light look. It’s beautiful, timeless, and literally goes with every color combination and theme you might be trying to strike this year, and for many years to come.
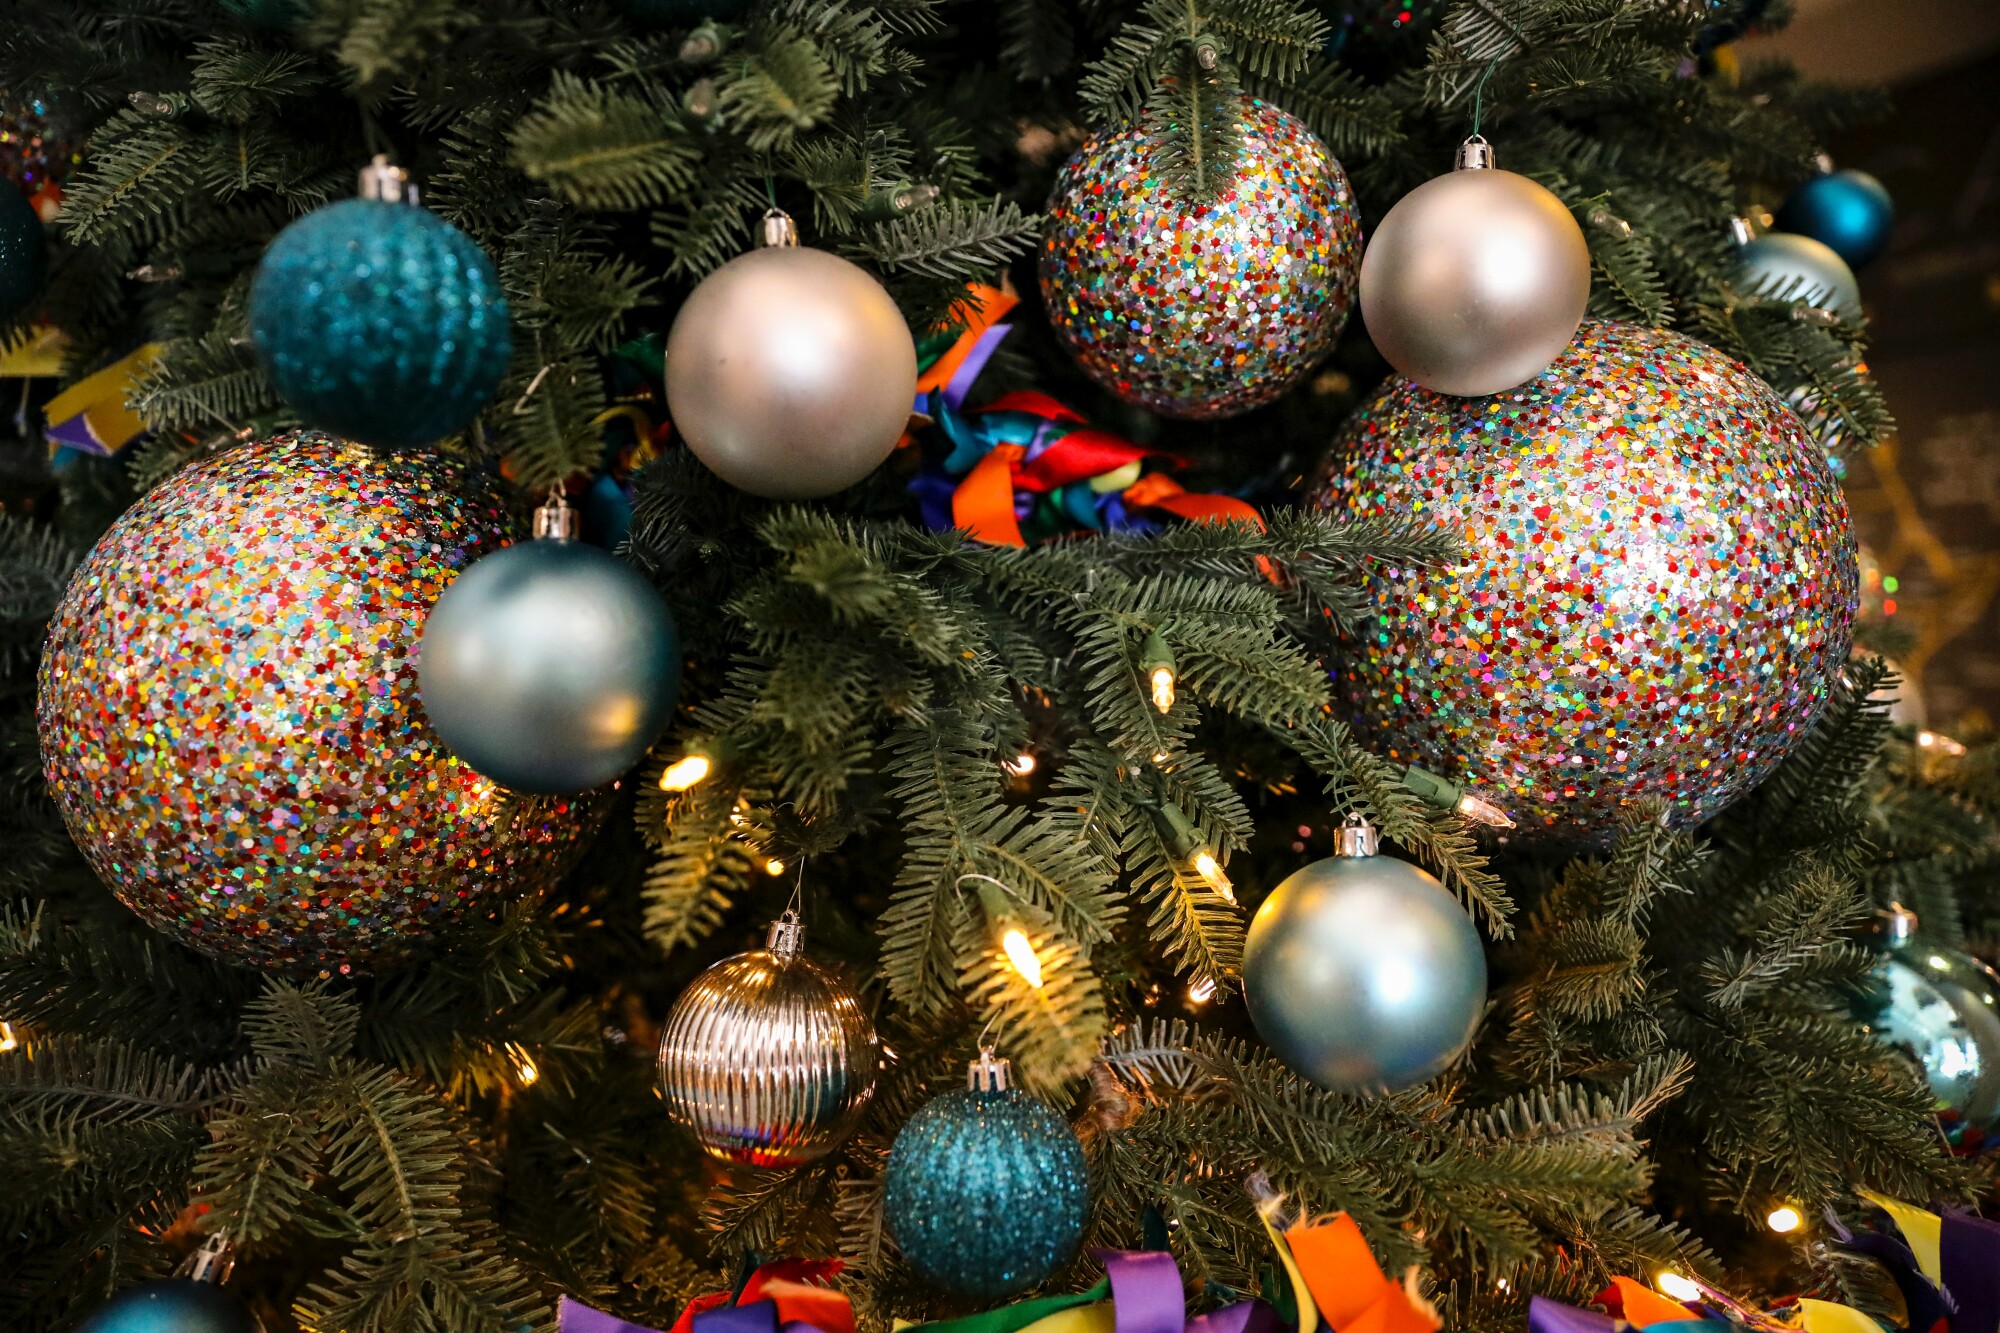
Colors + Patterns—Oh YES!
Once the tree and the lights are secured, the color scheme is next. This is one of my favorite selections during the holiday season. No need to stick with the traditional red theme that you and your mom, and grandma, and everyone in your family has done through the history of Christmas. Have some fun here! Choose something you like, but if it’s a little daring—go for it.
Is your favorite color purple? Awesome—have a gorgeous, purple and proud tree. Love that trendy green hue? Use that as your inspiration. Maybe you’re more glam? Go all out in silver and gold metallics. Are you a fan of the black and white plaid look? There are tons of options for that look, too! Choose a color (or 2!) or a pattern you really enjoy, and shop for your tree around that scheme.
Embellish Away
Hobby Lobby is your friend. Let’s repeat that together! Hobby Lobby is your friend. And, you don’t need to wait for the chaos of the final days of the year to go shopping. I just scored some awesome Buffalo Plaid Check looks from my favorite store at nearly 75% off just weeks ago. Go now!!
With your fun (and maybe a little daring) color scheme in mind, go all out in selecting ribbon, beads, bulbs of all sizes and shapes in your color/pattern, and plenty of extras, too. Think flowers, leaves, branches, and other cute accents you can find perusing the aisles of Hobby Lobby. The options are limitless!
Don't Skip on the Topping
While you’re on your shopping extravaganza, don’t forget to snag a show-stopping tree topper that will complete your new theme. Choose something that really finishes the look, and is the appropriate size for your tree. Don’t choose something that looks too large that will dwarf the size of your tree, and also be weary of selecting something that is too small.
It’s important to snag the tree skirt while you’re at it. Choose a look that again complements the size of your newfound tree, and also matches your new color scheme/pattern.
Let’s Decorate!
Now that you’re armed and dangerous with all the beauty that is the Christmas season from Hobby Lobby, you’re all set to decorate! Turn on those Christmas tunes, make some hot chocolate, and follow these simple steps to decorating that gorgeous on-theme tree with these 5 easy steps:
1. Ribbon and garland first. Make it easier on yourself. Do this first, wrap it all around your tree. I usually go for a wrap around the width of the tree. But, this year I actually cut long strands of ribbon with wire and strung long strands of ribbon, delicately tucked in and out of the tree from the top of the tree to the bottom. It's such a neat look, and I actually think it's easier than running the ribbon around the tree width-wise.
2. From here, grab with the ornaments. Place larger bulbs first—since there will be more real estate to work with. Place them prominently, and be sure to spread them evenly throughout the tree—especially if your tree backs to an outside window. Once all larger bulbs are placed, work your way down to the medium sized bulbs and then smaller ones. Placing all evenly around the tree.
3. Embellishments next. Now that your tree is looking pretty decked out and well decorated, add in those extra touches of sprigs of leaves, branches, extra sparkle, flowers, and anything else on-theme. *Note: If your tree is looking a little bare, revisit step 2 and add some more bulbs, and embellishments where needed.
4. Finish off the look with topping the tree with a showstopper of a topper that is appropriately sized, and then by placing the skirt around the bottom.
5. Save the lighting for last. It’s such a transformation when the tree is lit for the first time. Decorate it fully, and then flip on those lights—it’s such a magical time of year, and such a joy to see your beautifully decorated tree in all its joyful glory.
In need of some extra support in the home beauty realm? Nest with the Nelsons is here to help! We’re booking sessions now for January 2023! Simply reply to this email to learn more about our virtual services and how we can best serve you.
Wishing you a wonderful season ahead, and can’t wait to help you transform your home from totally dull to completely full of Christmas cheer!
Love + Peace Always,
Megan Nelson, Co-Owner + Founder
Nest with the Nelsons
nestwiththenelsons.com
nestwiththenelsons@gmail.com
P.S. Did we mention that our virtual sessions start as low as $99? It's an amazing gift to give to a loved one!
There’s really nothing to lose. Book your personalized, easy, and super fun session today before our calendars fill up. We're now booking into 2023!
There’s really nothing to lose. Book your personalized, easy, and super fun session today before our calendars fill up. We're now booking into 2023!


0 Comments